Friday 27 August 2010

Tips for Flex editing in Logic 9 - Part 2

In the second of our tips, brought to you by Jail Recordings,  we're looking at flex editing again.  This time we'll share a tip on working with recorded audio with to tempo reference.
Logic 9 uses a combination of transients and embedded tempo information in audio files to quantize audio. When you record audio in a Logic project, the project tempo setting is used. If you record without reference to the project tempo, or if you import audio that was recorded with another application, then Logic will likely not have the correct reference points to properly perform quantization, and thus will not be ready for Flex editing. 
Here are several workflows to embed the correct tempo information into an audio file to prepare for Flex editing. Choose one, depending on your situation:
If the underlying tempo of the recorded audio is steady, and is close to the tempo of the project
  1. Enable Flex mode.
  2. Grab the upper-right side of the region and drag it right or left to match the tempo of the audio to the project tempo.
If the underlying tempo of the recorded audio is steady, but is not close to the tempo of the project
  1. Highlight the audio region in the Arrange window.
  2. Go to the local Audio menu in the Arrange window and choose Detect Tempo.
  3. Logic will analyze the audio file. If the resulting tempo is good, click OK.
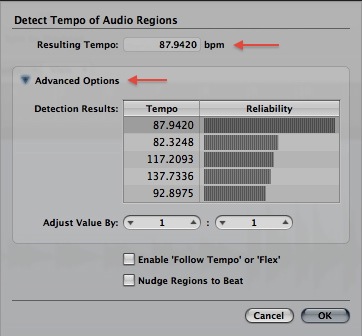
  4. If the resulting tempo is not what you expect, click the disclosure triangle for Advanced options, and choose one of the alternate tempos in Detection Results. Click OK.
If the underlying tempo of the recorded audio varies
  1. Create a new Logic project.
  2. Import the audio file into the project, and put it onto a track in the Arrange window.
  3. Adjust the left region boundary to remove any silence from the beginning of the region, and move the region so it starts at position 1 1 1 1.
  4. With the audio file highlighted, choose Options > Tempo > Remove Tempo Information from Audio File.
  5. Go to the local View menu in the Arrange window and choose Configure Global Tracks.
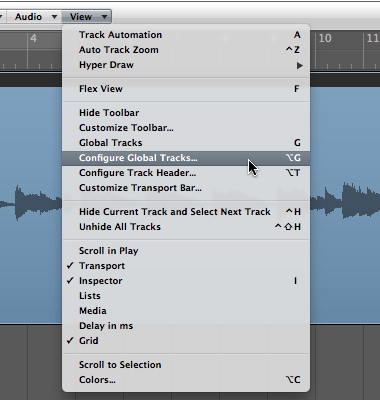
  6. Select the option for Beat Mapping if it is not already selected then click Done.
  7. In the upper-left corner of the track list, click the Global Tracks disclosure triangle.
  8. Click the Beat Mapping disclosure triangle in the Global Tracks header.
  9. Click the Detect button in the Beat Mapping header.
    The audio file will be analyzed for transients, which will appear in the Beat Mapping track as vertical white lines.
  10. Use the Transients "+" or "-" buttons in the Beat Mapping track header to increase or decrease the number of detected transients as needed.
  11. To start beat mapping, grab a point on the beat grid along the top of the Beat Mapping track and drag it to the transient in the audio file that corresponds to the beat number. In the example below, the third transient in the audio file should fall on beat 2, so we grab the grid at beat 2, and connect it to that transient.
  12. A new tempo is now set.
  13. Continue beat mapping the file, connecting beats in the grid to appropriate transients. A series of tempo changes is created.
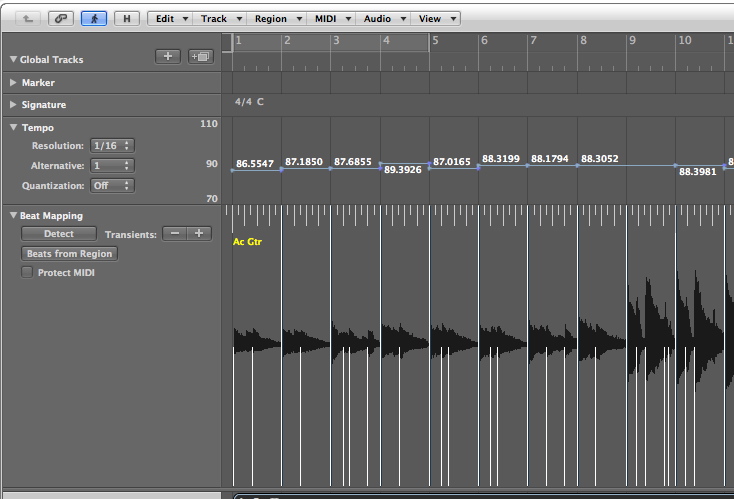
  14. When you've worked through the audio file, choose Options > Tempo > Export Tempo Information to Audio File.
The file is now ready to be used with Flex editing. When you enable flex in a project, the audio file will follow the project tempo, even if the project contains tempo changes. Conversely, an audio file with a fluctuating tempo will play steadily in a project with a constant tempo.

Sunday 15 August 2010

Tips for Felx editing in Logic 9 - Part 1

Welcome to the first of the tips, brought to you by Jail Recordings.  This time, we're bringing you a tip for working with Logic's flex editing facility when working with phase locked drums.


Create a Group
First create a group for the drum tracks. You should do this before you record the tracks, but you can do this afterward if necessary. However, you need to create the group before you start editing the drum tracks. To create the group:
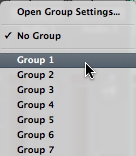
  1. Click inside the group slot in one of the drum track channel strips.
  2. Choose an unused group from the drop down menu.
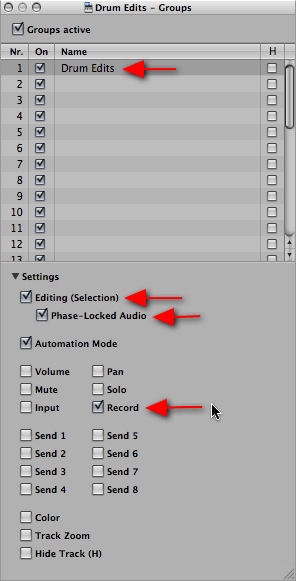
  3. The Group Settings window will open. Click to enable the options for Editing, Phase-Locked Audio, and Record. It's also a good idea to give the the group a descriptive name.
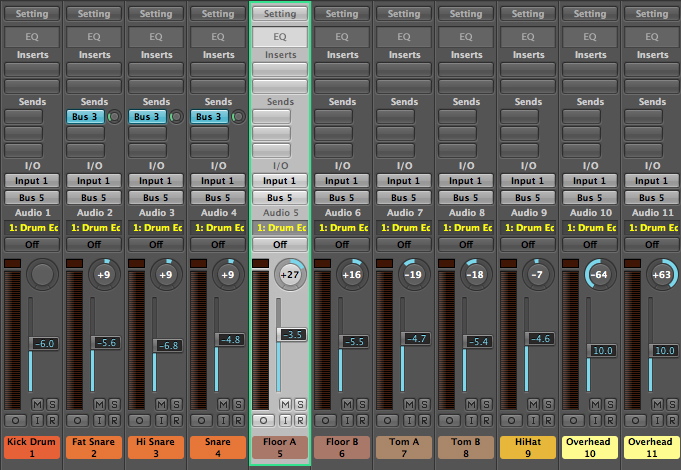
  4. Close the Group Settings, then Option-click the group slot in each of the other drum track channel strips to assign them to the group.
Record and Edit
Record the drum tracks. When you're done recording, use Quick Swipe comping to create the best composite take. Make any other edits, such as copying sections from one part of the song to another, and so on.
Flatten and merge
When you're satisfied with your comping and editing, flatten and merge the take folders:
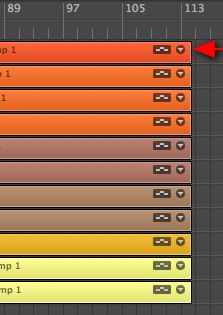
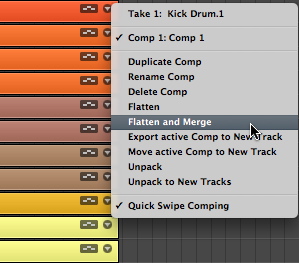
  1. Click the disclosure triangle in the upper right corner of one of the take folders.
  2. Choose Flatten and Merge from the drop-down menu.
  3. Note: This is recommended because phase-locked editing requires that all tracks in the group have the same start position and be exactly the same length. By merging all the regions and takes on each track to one audio file, discrepancies are less likely to appear. Also, because Logic's transient detection is file based, you need to go through the process of adjusting transients only once for each Q-Reference track.
Choose tracks as Q-Reference
Decide which tracks should be used as Q-Reference tracks that will be used to determine quantization for the group. Typically, a snare and kick drum track are used as reference tracks. If you used multiple microphones on either drum, choose one track for each.
  1. Open one of the tracks you want to use as a reference in the Sample Edit window and choose Audio File >Detect Transients.
  2. After Logic analyzes the file, check the transients in the Sample Edit window to make sure they are positioned correctly. Use the "+" (plus sign) and "-" (minus sign) buttons to add or subtract transients, move incorrectly placed transients, or manually add or remove transients with the pencil or eraser tools.
  3. Repeat these steps for any other files you will use as Q-Reference.
    Note: It's not necessary to adjust the transients for the other tracks in the group; their timing will be adjusted with sample accuracy based on the transients in the Q-Referenced tracks.
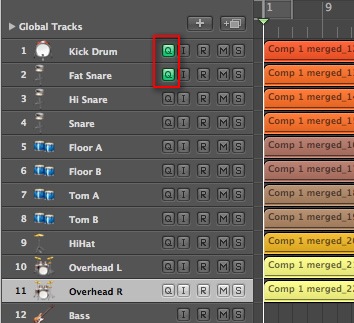
  4. In the Track Header of the Arrange window, enable the Q-Reference button for the tracks to be used as timing reference.
  5. Note: If you need to return to the Sample Edit window to adjust the transients for any of the tracks after this stage, it's very important to disable the Q-Reference buttons for all tracks in the group first, otherwise, the transient edits will not carry over to your subsequent timing adjustments.
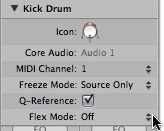
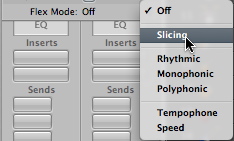
  6. In the Channel Strip parameter box for one of the tracks, click the Flex drop-down menu and choose one of the Flex Modes. For drums, Slicing is usually the best choice, but feel free to experiment with the others. The Flex Mode will be assigned to all tracks in the group.
Enable Flex View in the Arrange window
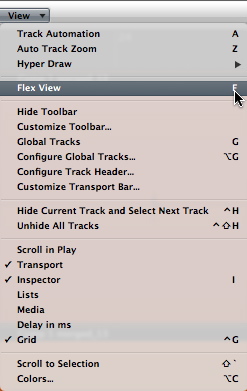
  1. Click the local View menu in the Arrange window.
  2. Choose Flex View from the drop-down menu.
Apply Timing Adjustments
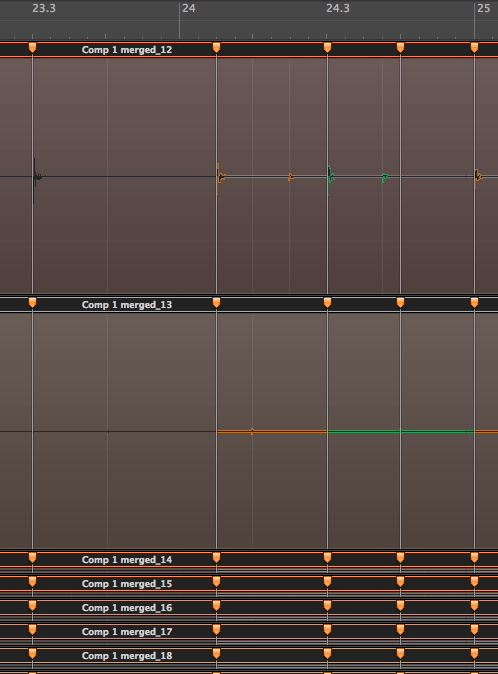
Perform your timing adjustments. For example, apply quantization to the tracks, or manually insert flex markers and drag audio in the reference tracks to desired positions.
When you apply quantization, you may find that some transients are quantized to unexpected positions. For example, if you choose a quantize value of 1/8 note, you may find that in places where there is no transient on the 1/8 note grid, a transient in between grid positions, such as an in-between 1/16 note is moved to to the nearest 1/8 note. You can prevent this by setting an appropriate Q-Range value in the region parameter box:
  1. Click the Advanced Quantization disclosure triangle at the bottom of the region parameter box.
  2. Click the up/down arrows to the right of the Q-Range parameter.
  3. Choose a relatively short value, such as 1/24 or 1/32. Experiment until you get the result you want.
Note: Q-Range limits quantization to transients that fall within the value you choose. For example, if you choose 1/32, then any transient farther away than 1/32 note from the quantization grid you choose will not be quantized.
Got any tips you want to share with other artists?  Submit them to info@jailrecordings.com and we'll add them to the blog...

Friday 13 August 2010

It's Here, the new blog from Jail Recordings.

Hello there, and welcome to the new blog from Jail Recordings.  So what's going to be on here?  Over the coming posts we will strive hard to bring you the best tips from the recording studio, great tips to help you get the best from recording suites such as Logic, Ableton and Pro Tools.

We'll also bring you reviews of some of the latest releases in club land as well as interesting articles from the world of music production.  So check back frequently to see what we've added.  Your comments, tips and experiences are also welcome.  you can always comment on the blog, or why not email through to us at  info@jailrecordings.com with any suggestions for the blog.

You can also keep up to date with Jail Recordings in the following ways

Jail Home:  www.jailrecordings.com
Jail on Twitter: @JailRecordings
Soundcloud: www.soundcloud.com/jailrecordings
Myspace: www.myspace.com/golgothaoutlaws
Soundclick: www.soundclick.com/golgothaoutlaws